Maximizing Your Flutter App's Performance with (Async)NotifierProvider, Freezed & Riverpod Code Generators
A Beginner's Guide to Using (Async)NotifierProvider, Freezed & Riverpod Code Generators for Efficient State Management


Maximizing the performance of your Flutter app is crucial for delivering a seamless user experience. As software developers, we constantly seek out tools that can enhance our coding experience while improving the efficiency and quality of our code. This beginner's guide focuses on utilizing the power of AsyncNotifierProvider and NotifierProvider from Riverpod, together with the Riverpod code generator, for efficient state management. By incorporating these tools, you can generate providers faster, simplify the process of passing ref property around, and streamline debugging. The guide includes simple examples that demonstrate how to use these providers in your project and leverage the benefits of the Freezed and Riverpod code generators.
Prerequisites
Basic knowledge of dart
A basic understanding of flutter and state management.
A code editor ( Android Studio or VScode recommended)
A mobile device or emulator to build on.
You’ve read the first article in this series or have at least a basic knowledge of how Riverpod works 👇🏽
Scope of this tutorial
In this tutorial, we will cover the following:
Examples to show the implementation of the Notifier and AsyncNotifier Providers.
How to use code generation tools like Freezed and Riverpod code generator.
How to use
AsyncValueto handle loading stateHow to use
copyWithwhen working with an immutable class.
Installation of Dependencies
First, you will need to get to your pubspec.yaml and add the following packages
dependencies:
  flutter_riverpod: ^2.1.3
  riverpod_annotation: ^1.1.1
  freezed_annotation: ^2.2.0
  freezed: ^2.3.2

dev_dependencies:
  build_runner:
  riverpod_generator: ^1.1.1
Then run flutter pub get
You have successfully added the necessary dependencies to your project.
Why use code generation tools?
If you choose to work without code generation tools, your Riverpod providers will still be fully functional. However, Riverpod greatly recommends using code generation tools. Code generation is using a tool to generate code. In dart, once you add the code generation syntax and compile, your code is automatically generated. Doing this saves you the time and energy you would have used to write that code, especially when you are working on a big project and need to handle those tasks repeatedly. Code generation will help prevent those errors that can happen when doing the same task repeatedly. It makes debugging better and generally makes your life easier.
Freezed Code Generator
Freezed is a code generation package that helps you create data classes with dart. With the use of Freezed you can generate models, unions and much more. Freezed allows you to focus on the definition of your data class, instead of writing long lines of code that may be error-prone.
Read more on what you can do with Freezed.
Riverpod Code Generator
With the Riverpod code generation package, it is now easier to declare providers. You no longer need to write your providers by hand or wonder which particular provider will suit your use case.
All you need to do is follow the syntax for defining your Riverpod code generator and annotate your code, then with build_runner you can generate all your providers.
For instance, this is the code generation syntax for these different Riverpod providers
For Providers:
@riverpod
int foo(FooRef ref) => 0;
For FutureProviders:
@riverpod
Future<int> foo(FooRef ref) async {
  return 0;
}
For StateProviders
@riverpod
class Foo extends _$Foo {
  @override
  int build() => 0;
}
You can notice that there is a pattern for creating the providers. Once you put the correct syntax you can generate the providers just like that.
Notifier Provider
Riverpod 2.0 came with the addition of two new provider types, the NotifierProvider, and the AsyncNotifierProvider. Riverpod recommends you use the NotifierProvider instead of the ChangeNotifier and StateNotifier providers, so we are focusing on these two.
The NotifierProvider is used to listen to and expose a Notifier. A Notifier exposes a state that can change over time.
Let’s consider a simple example 👇🏽
We will build a random string generator with two buttons, one to generate a new string and the other to clear the entire list of strings. In this example, we will also be using the Riverpod code generator.
First, using Riverpod annotation and the code syntax below, we will create a NotifierProvider. We will also add the functions for adding a random string and clearing the list of strings. We will add the name of the file to be generated by specifying with
partas seen in the code.Note: The name of the file to be generated is the same as the name of the current file you are working on. When specifying it with
partyou will need to add.g.dartas that is how Riverpod-generated files are named.
import 'package:riverpod_annotation/riverpod_annotation.dart';

part 'notifier_list_provider.g.dart';

@riverpod
class RandomStrNotifier extends _$RandomStrNotifier{
  @override
  List<String> build() {
    return [];
  }
//using Dart's spread operator we create a new copy of the list
  void addString(String randomStr){
    state = [...state, randomStr];
  }

  void removeStrings(){
    state = [];
  }
}
From our code, we can see that the RandomStrNotifier returns an empty List, then we added the two functions to add to the list and clear the list. NotifierProvider and AsyncNotifierProvider support immutable state, because our state is immutable, we can not say state.add or state.remove. So we create a new copy of the list. state is used for updating the UI state.
To run the code generator, run this command on the terminal:
flutter pub run build_runner watch --delete-conflicting-outputs
After it has successfully run, you can see your generated provider file, in your project tab, in your code editor.
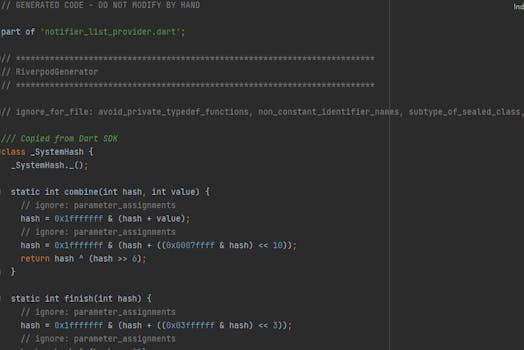
From the image above you can see how the generated file will look like.
Note: If you get the error Could not find a file named "pubspec.yaml" in "C:\Users\… then run the dart pub get command on your terminal.
- Moving on, let’s add this provider and the functions to our UI
Widget build(BuildContext context, ref) {
        // rebuid the widget when there is a change
    List<String> randomStrList = ref.watch(randomStrNotifierProvider);
    final random = Random();
    return Scaffold(
      appBar: AppBar(
        title: const Text("RiverPod Notifier Example App"),
        backgroundColor: Colors.brown,
      ),
      body: SingleChildScrollView(
        child: Column(
          children: [
            Column(
              children: [
                                //map to a list
                ...randomStrList.map((string) =>
                    Container(
                      alignment: Alignment.center,
                      margin: const EdgeInsets.only(bottom: 10,top: 5),
                      height: 30,
                        width: 300,
                        color: Colors.brown,
                        child: Text(string.toString(),
                          style: const TextStyle(
                            color: Colors.white
                          ),
                        )))
              ],
            ),
            Row(
              mainAxisAlignment: MainAxisAlignment.spaceAround,
              children: [
                ElevatedButton.icon(
                  icon: const Icon(Icons.add),
                  label: const Text('Generate'),
                  style: ElevatedButton.styleFrom(
                    backgroundColor: Colors.brown, // Background color
                  ),
                  onPressed: () {
                                    //add string to list function
                    ref.read(randomStrNotifierProvider.notifier).addString("This is the "
                        "random String ${5  + random.nextInt( 1000 + 1 - 5)}");
                  },
                ),

                ElevatedButton.icon(
                  icon: const Icon(Icons.clear),
                  label: const Text('Clear'),
                  style: ElevatedButton.styleFrom(
                    backgroundColor: Colors.brown, // Background color
                  ),
                  onPressed: () {
                                    //clear list function
                    ref.read(randomStrNotifierProvider.notifier).removeString();
                  },
                )
              ],
            )
          ],
        ),
      ),
    );
  }
As you can see the Riverpod code generator, generated a matching randomStrNotifierProvider
When you run the app it should look like this 👇🏽
AsyncNotifierProvider
The AsyncNotifierProvider is used to listen to and expose an asyncNotifier. The AsyncNotifier is a notifier that is asynchronously initialized.
Let’s dive into the example
We will be building a simple app that loads a list of products after a time duration of 3 seconds with a button to clear the list of products.
- First, we will use the Freezed code generator tool to create our product class. Then using the
copyWithmethod we will create the product objects that will be going into our list. We will add the name of the file to be generated by specifying withpartas seen in the code. The name of the generated file is the current name of your file and.freezed.dartThis is how the freezed files are named.
import 'package:freezed_annotation/freezed_annotation.dart';
//replace with part 'name_of_your_file.freezed.dart';
part 'async_notifier_list_provider.freezed.dart';

@freezed
class Product with _$Product{
  const Product._();
  const factory Product({
    String? name,
    String? description,

  }) = _Product;

}

  const Product _product1 =  Product(name: "Dart course for beginners",
                            description: "This is course will make you a dart star");
  final Product _product2 = _product1.copyWith(description: "This course will make you a pro");
  final Product _product3 = _product1.copyWith(name: "Ultimate Dart course for beginners");

final products = [
              _product1,
              _product2,
              _product3,
];
We can run this command on the terminal to generate the freezed file
flutter pub run build_runner watch --delete-conflicting-outputs
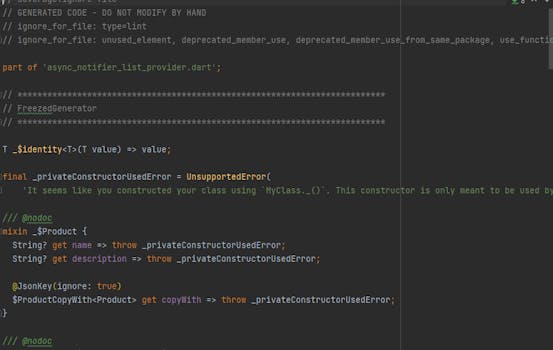
The image above shows how the Freezed generated file will look like.
We used the copyWith method to create new objects of product that we added to the list. The copyWith method is used for returning a new object with the same properties as the original but with the values you have specified, it is used when working with immutable structures like Freezed.
Now we will go ahead and add our Riverpod provider class, which will be fetching the list of products after 3 seconds. We will also add the function to clear the list of products as well.
//replace with part 'name_of_your_file.g.dart';
part 'async_notifier_list_provider.g.dart';

@riverpod
class AsyncProducts extends _$AsyncProducts {
  Future<List<Product>> _fetchProducts() async {
    await Future.delayed(const Duration(seconds: 3));
    return products;
  }

  @override
  FutureOr<List<Product>> build() async {
    return _fetchProducts();
  }

  Future<void>clearProducts()async {
    state = const AsyncValue.loading();
    state = await AsyncValue.guard(() async{
      await Future.delayed(const Duration(seconds: 3));
      return [];
    });
  }

}
The asyncNotifierProvider returns a future list of products. To modify the UI we will now create the clearProducts function, using AsyncValue class we can easily manage the loading, error state, and data state.
Looking at the AsyncValue class, AsyncValue.guard is used to transform a Future that can fail into something safe to read, it is recommended to use this instead of try and catch blocks. it will handle both the data and error states.
Next, run this command on the terminal to generate the necessary Freezed and Riverpod code
flutter pub run build_runner watch --delete-conflicting-outputs
Let’s add this provider and function to our UI
Widget build(BuildContext context, WidgetRef ref) {
    final productProvider = ref.watch(asyncProductsProvider);
    return Scaffold(
        appBar: AppBar(
            title: const Text("AsyncNotifier"),
            actions: [
              IconButton(
                icon: const Icon(
                  Icons.clear,
                  color: Colors.white,
                ),
                onPressed: () {
                  ref.read(asyncProductsProvider.notifier).clearProducts();
                },
              )
            ]
        ),

      body: Container(
        child: productProvider.when(
          data: (products)=> ListView.builder(
              itemCount: products.length,
              itemBuilder: (context, index){
                return Padding(
                  padding: const EdgeInsets.only(left: 10,right: 10,top: 10),
                  child: Card(
                    color: Colors.blueAccent,
                    elevation: 3,
                    child: ListTile(
                      title: Text("${products[index].name}",style: const TextStyle(
                          color: Colors.white,  fontSize: 15)),
                      subtitle: Text("${products[index].description}",style: const TextStyle(
                          color: Colors.white,  fontSize: 15)),
                    ),
                  ),
                );
              }),
          error: (err, stack) => Text("Error: $err",style: const TextStyle(
              color: Colors.white,  fontSize: 15)),
          loading: ()=> const Center(child: CircularProgressIndicator(color: Colors.blue,)),
        ),
      ),
    );
  }
Here we can see that by calling ref.watch we can access our provider, then we add the clear product function to the onPressed by calling ref.read. Now we can handle the different states of the response, using productProvider.when
When you run the app it should look like this 👇🏽
Recap
We have come to the end of this tutorial. Here we have learned that:
The NotifierProvider listens to and exposes a notifier, when there is a change in state, it automatically updates the UI. AsyncNotifierProvider is used to listen and expose a notifier that is asynchronously initialized.
Using code generation tools like Freezed and Riverpod code generators, we can easily generate data and provider classes with very little code.
The copyWith method used to create a new object but with values you specified, when working with immutable classes.
Finally, the AsyncValue class is used to efficiently handle data, loading, and error states.
Conclusion
Congratulations, you have successfully learned how to use Riverpod’s newest providers, NotifierProvider and AsyncNotifierProvider to manage state, how to use code generation tools to generate code, and how to use copyWith method and AsyncValue class. If you enjoyed this article, do well to leave a reaction and follow me for more content. If you have any questions or spot any errors, please do leave feedback.